Teach Your Cat to Love the Carrier
.jpg)
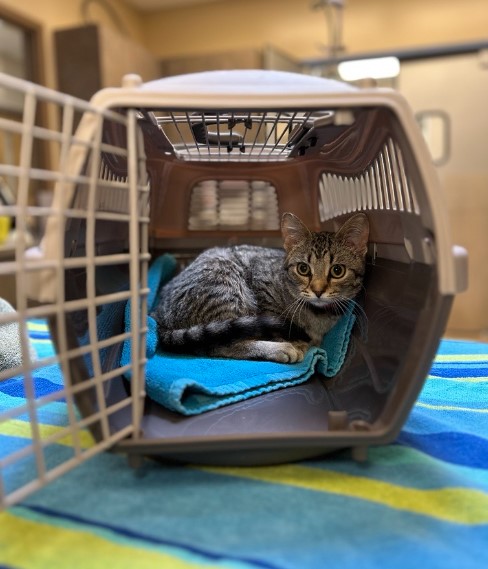 Many people believe that their cats do not like and will never like their carrier. It doesn’t have to be that way! Recent studies show that when you train your cat to go into the carrier willingly using positive reinforcement, they show less stress on car rides, vet trips become shorter, and they don’t struggle to go into the carrier. This can be accomplished by making the carrier a part of their everyday life instead of only pulling it out when they are going to the vet.
With a proper introduction to the carrier, your cat will enjoy going into it and will even tolerate the car ride, as well! Here’s an easy, step-by-step process that will give your cat a positive new association to the carrier. Read through all the steps below, then check out our video tutorial to see some of the steps in action!
Step 1: Desensitize
- Leave the carrier around the house at all times. Make sure it is in a place where your cat already feels comfortable (ex. near the couch, your bed).
- Turn the carrier into a “den.”
- Remove the top and the door if it is a hard carrier.
- Place one of their favorite beds in the open carrier – you can also use a piece of your clothing that has your scent for comfort.
- Place a few of their favorite toys in the “den.” - Allow your cat to ignore or investigate as she sees fit; just don't make a big deal out of it.
- After a few days (possibly a few weeks), you should find that your cat is rather indifferent to the carrier, but possibly has now developed some level of interest.
- Don't rush it. Make sure your cat’s comfortable with the carrier in the room before moving on.
Step 2: Positive Association with Food
Once the previous step has been completed and any negative association has been lessened as much as possible, you can start to create a positive association much more effectively with food.
Start by putting some highly desirable food in the entrance of carrier, like chicken or tuna. If possible, try to make sure your cat is nearby and is aware that you are putting something in the carrier, but don't make a big deal out of it. If they ignore it, be patient and just keep trying.
Gradually move the food further inside until it is at the back so they must show a little courage and go all the way inside if they want the treat. If you've already gotten your cat to eat inside the carrier, then make sure you feed them every meal in the open carrier for a while.
Provide a “jackpot treat.” This is a treat that they will never turn down and something they should only get when they go into the carrier on their own. This will begin to associate the carrier with their favorite treats. Jackpot treats can be lickable treats, their favorite canned food, or anything they typically come running for when they hear, see or smell it.
Step 3: Add the Top of the Carrier Back On
Once your cat is comfortable with its “den,” put the top back on. Make sure to do this when the cat is not around. Continue to use food and jackpot treats, as usual. Do not rush to the next step and only proceed when your cat is comfortable going inside the crate with the top on.
Step 4: Add the Door Back on the Carrier
Now put the door back on the carrier. This step can be problematic due to the sound of the door opening or closing. That can be a real trigger for cats. We suggest taping the door open initially so it doesn’t swing back and forth.
Once your cat is comfortable eating inside the carrier, try gently pushing the door mostly closed while they’re eating. Don’t lock it at this stage. If your cat becomes distressed or agitated, open the door immediately. If they become distressed or agitated, you may want to slow down the process and take a few steps back.
When you are able to gently shut the door without a problem, you can begin to lock the door. Start with just a few seconds, and if your cat becomes distressed, open the door immediately.
This will eventually create a positive association with having the door closed while they are inside. Eventually you will be able to leave the door closed for a few minutes after they’ve finished their food.
Step 5: Moving the Carrier
Once you get to the point where you can have your cat in the carrier with the door closed comfortably, try picking up the carrier, putting it back down, then opening the door.
When your cat is comfortable being picked up and put back down while in the carrier, the next step is to pick the cat up in the carrier and carry them into another room before putting the carrier down and opening the door
This will begin to replicate conditions that your cat will experience when it’s time to visit the vet. We are trying to teach them that they are not going to the vet every time they go into the carrier. If your cat’s experience remains the same and predictable 99 times out of 100, they will be able to manage the one time in the carrier while going to visit the vet.
Step 6: Getting the Cat Used to the Car
Once your cat is comfortable being inside the carrier for 7-10 minutes, you’re ready to try taking them out for a drive. Line the bottom of carrier with something absorbent (such as newspaper) in case of an accident, and put something warm and soft (such as a towel or small blanket) on top of it.
Encourage your cat to enter the carrier.If this is difficult, you will need to continue with the previous two steps for a while longer before attempting to drive anywhere.
Put the carrier securely on one of the car seats. Make sure that the carrier is on a blanket to reduce vibration, and is fastened by a seat belt so that it does not slide around. Also, make sure that little (if any) direct sunlight gets into the carrier; this could be very unpleasant for the cat and may undo some of your hard work. You can do this by placing a blanket over the carrier – just keep the weather in mind
Go for a drive that lasts considerably less time than the cat's shortest comfortable time in the carrier so far. Even driving 200 yards up and down the road will be fine for the first trip.
Every day for the next week, take your cat out for a longer drive, then continue to do so regularly now and then over time. Eventually, going out in the cat carrier will be no stress at all.
Don’t forget: any time your cat shows signs of stress during the process, you need to stop and go back to the previous step and give them extra time to acclimate. This isn’t something you can tackle the day before a vet visit – find a period of time when you can really commit to the process without feeling rushed, and you’ll both benefit from a stress-free experience. Continue building positive associations and you’ll soon find that you have actually trained your cat to love the carrier!